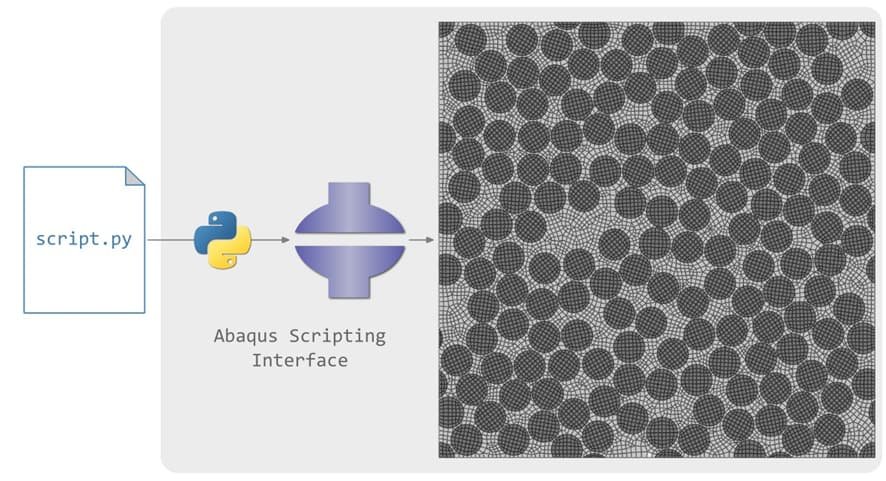
If you’re still setting up every simulation by hand, you’re missing out on huge time savings. Modern CAE tools let Python scripts orchestrate the whole workflow – geometry, mesh, solver setup and post-processing – as one seamless pipeline. In fact, “CAE automation is the process of streamlining simulation workflows—geometry creation, meshing, solver setup, and post-processing using scripts instead of manual clicks. By moving from tedious GUI clicks to Python code, you can handle dozens of design variations in the time it once took to do a handful manually. Industries like automotive and aerospace now demand these automated workflows for faster innovation and accuracy.
Why Python for CAE Automation?
Python is the lingua franca of CAE automation because it’s powerful yet easy to use. By scripting your analysis, you unlock dramatic benefits:
- Massive Time Savings: Automated scripts can cut model setup and meshing time by 70–80%. Batch-running the same analysis for 20+ parameter sets (different loads, materials, etc.) becomes trivial – what used to take days can run overnight.
- Higher Accuracy: Scripts enforce consistency, eliminating many human errors. For example, repeated manual steps like material assignment can introduce mistakes, whereas a scripted loop assigns properties exactly the same way each time.
- Parametric Design: Instead of rebuilding models by hand, you change one variable in code and regenerate everything. As one expert notes, once your script is working you can “quickly change the value of the variable and rerun the script in loop as many times as you want. This makes design studies and optimization trials easy.
- Focus on Engineering: Freeing yourself from repetitive tasks lets you concentrate on core design problems and innovation Rather than clicking through menus, you use your expertise to refine models and interpret results.
In short, Python scripting transforms CAE from button-clicking to programmatic engineering. If you want to stay competitive (and save your sanity), learning to script Abaqus (and other FEA tools) is a must.
Setting Up Your Python Environment
Before you write scripts, make sure your Python environment is ready. Abaqus includes its own Python interpreter (historically Python 2.7, now moving to Python 3 in newer releases). Here’s how to get started:
- Install Python 3: Download Anaconda or Miniconda and create a new environment (e.g. conda create -n cae python=3.10). This lets you manage packages like NumPy and Pandas without interfering with system Python.
- Install Core Libraries: Within your env, install essential packages (numpy, scipy, pandas, matplotlib, etc.). These will help with data processing and plotting.
- Link to Abaqus: Use Abaqus’s Python to run scripts so it finds all CAE modules. For example, launch scripts with abaqus python myscript.py. This ensures you can import Abaqus-specific libraries (abaqus, abaqusConstants, odbAccess) without errors.
- Use an IDE & Version Control: A good editor (like PyCharm or VSCode) with syntax highlighting makes scripting easier. Also use Git or similar for your script files so changes are tracked and you can collaborate.
Following these steps ensures your Python setup matches Abaqus’s requirements. Always test that your script can import abaqus modules – if not, double-check you’re using the Abaqus Python interpreter. Once it’s working, you’re ready to automate.
Figure: Core Python libraries for CAE and FEA workflows (source: CAE Assistant). In practice, you’ll lean on many open-source packages to automate tasks in Abaqus (and other CAE tools). For geometry and CAD creation, tools like CadQuery (parametric CAD scripting) let you define parts with code. Meshing can be automated with libraries such as pygmsh or meshio. To drive FEA solvers, interfaces like abapy (for Abaqus) or PyNastran (for Nastran) let scripts create models and submit jobs. And of course, NumPy, Pandas, and Matplotlib are indispensable for analyzing simulation results and generating plots. By combining these tools in Python, you can script almost every step of your CAE workflow in just a few lines of code.
- CadQuery / pyOCCT: Parametric CAD modeling in Python. Change a dimension or add a hole by editing code.
- pygmsh / meshio: Generate and export meshes programmatically for complex geometries.
- abapy / PyCalculix / PyAnsys: Python APIs to set up parts, materials, loads and run Abaqus/Nastran/Ansys models.
- NumPy / Pandas / Matplotlib: Process output data and create automated plots (stress vs. strain, contour charts, dashboards).
- OpenSeesPy / FEniCS / SfePy: Python-based FEA frameworks for structural (OpenSees) or general simulations (FEniCS, SfePy) if you need open-source alternatives.
With these libraries, virtually any manual task in Abaqus – sketching a part, seeding a mesh, applying loads, reading results – can be coded. The image above lists core options and many more (see the awesome-CAE GitHub for an extensive list). In the next sections we’ll see how to put them to work.
Automating Pre-Processing (Geometry, Mesh, Materials)
Abaqus/CAE is fully scriptable. Whatever you do by hand in the GUI, you can replicate with Python commands. To automate model setup:
- Geometry Creation: Instead of drawing sketches by hand, write Python code. You can use CadQuery to define parametric shapes – for example, script a beam with holes by specifying hole positions in code. Changing one parameter (like hole count) regenerates the model automatically. You can also use Abaqus commands (mdb.models[‘Model-1’].ConstrainedSketch, Part.Box, etc.) to build geometry directly in a script.
- Assembly: Use Python to place and constrain parts. Calls like mdb.models[‘Model-1’].PartInstance let you insert instances into an assembly at given locations, avoiding manual dragging. By scripting, you ensure every instance is placed exactly as intended.
- Meshing: Python can seed and mesh parts. For instance, call part.seedPart(size=0.5) and part.generateMesh(). For specialized meshing (e.g. creating tetrahedral vs. hex elements), Python gives full control programmatically. You can also export geometry to external meshing tools (like pygmsh) to build a mesh and then import it via Python.
- Material & Sections: Define materials in script, or loop through a database of material properties. Abaqus commands (mdb.models[‘Model-1’].Material, .Density, .Elastic) let you assign properties. You can script the assignment of materials and sections to sets of elements. For example, instead of manually selecting 20 parts, write a loop that assigns “Aluminum 6061” to all parts named “Bolt_*.” This database-driven approach is far more reliable than clicking each face.
- Loads and BCs: Python can find nodes/faces by geometry or set names, then apply loads. For example, create a function to apply a pressure or constraint to a named surface. You could loop over a list of locations to apply multiple point loads. This ensures every load case is defined consistently.
By scripting pre-processing, you avoid the tedium of repetitive clicks. A small change (like a new hole diameter or a different material) means updating one variable in code, not redoing the entire setup. As VIAS3D notes, once the setup commands are in a script you won’t have to “repeat tasks that were done before – you just tweak values and rerun.
Check Out our Parametric study with Python in Abaqus.
Automating Parametric Studies and Batch Runs
Running multiple simulations with varying parameters is where scripting shines. Instead of manually rebuilding the model each time, write a Python loop:
- Parameter Loop: For each design case (different geometry or load), assign a new value to your variable in code. For example, change a parameter like hole_diameter = 5 + 1*i inside a for i in range(10) loop.
- Regenerate Model: Within the loop, rebuild the geometry/mesh with the new parameter (using your existing script logic).
- Submit Job: Call Abaqus from Python (e.g. os.system(“abaqus job=JobName i=Model.cae interactive”)) to run the simulation.
- Extract Results: After each run completes, you can immediately extract data (see next section) and save it.
Because you’ve automated setup, running 50 design cases is as simple as looping 50 times. “After an initial verification of the script,” engineers can “quickly change the value of the variable and rerun the script in loop as many times as [they] want”. This is ideal for design optimization or sensitivity studies. You can also script job submission to run in parallel on clusters or cloud resources for even faster throughput.
Automating Post-Processing and Reporting
Gathering and plotting results is often just as time-consuming as setting up the model. Python can do this automatically:
- Reading Results: Use Abaqus’s odbAccess module (built into its Python) to open the output database (.odb). For example:
- from odbAccess import openOdb
- odb = openOdb(path=’Job-1.odb’)
You can then extract fields (stress, displacement, etc.) from each step. For Nastran or other solvers, similar Python readers (or exporting results to CSV) can be used.
- Data Analysis: Load extracted data into Pandas DataFrames. This makes it easy to filter, average, or compare results. For instance, you could create a table of maximum stress vs. load case, or compile fatigue-life estimates for multiple scenarios. Panda’s data structures handle this cleanly.
- Plotting: Generate graphs with Matplotlib or similar. Common tasks: plotting load-displacement curves, stress vs. position plots, or overlaying results from different runs. Scripts can automatically label axes, set scales, and save each plot as a PNG or PDF. For example, a simple loop can plot the von Mises stress contour for each case and export image files, instead of manually capturing screenshots.
- Report Generation: Python can create full reports. Use libraries like ReportLab or openpyxl to write a PDF or Excel summary of results. You could automatically insert charts into a Word report or compile a presentation. In practice, many teams automate their weekly reports this way – the 20-slide deck you used to build manually can be 90% done by the time you check the outputs.
- Dashboards: For multi-simulation studies, consider libraries like Plotly or Matplotlib to build dashboards showing key metrics. For example, plot all stress-strain curves from a parametric sweep on one figure for easy comparison.
By coding the post-processing, you eliminate repetitive result-reading and plotting. A single script can open dozens of .odb files, compute necessary values, and generate everything from CSV tables to annotated contour plots. Your final results – charts and tables – appear at the click of a button, ready for decision-makers.
Advanced Techniques: AI, ML, and Multiscale CAE
Once you’re comfortable with basic scripting, you can explore advanced automation trends:
- Machine Learning: Python’s ML libraries (scikit-learn, TensorFlow, PyTorch) allow you to integrate AI into your CAE process. For instance, use past simulation data to train a model that predicts stress outcomes for new designs. Or use optimization algorithms (e.g. genetic algorithms) to automatically search for the best design parameters. Tools like Siemens HEEDS or modeFRONTIER can be driven by Python to automate design space exploration.
- Synthetic Data: Generating large FEA datasets is costly. Python can help by creating synthetic training data. For example, randomize material properties or geometry within known bounds to produce many sample simulations. This data can train surrogates or neural networks for real-time predictions.
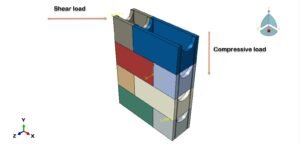
- Multiscale/Micromechanics: In composite or microstructure problems, Python scripts can automate building representative volume elements (RVEs) and coupling them to macro models. For example, you could script the generation of a fiber-reinforced microstructure mesh and then feed its effective properties back to a larger-scale model. (Research often uses Python for FE² multiscale analysis, although specific references are outside this blog’s scope.)
- Open-Source Solvers: Python-based FEA frameworks like FEniCS or SfePy let you set up custom finite element simulations from scratch. Automating in these environments means you can, for instance, write a single Python file that defines a PDE and solves it. There are also projects like PyFoam for OpenFOAM, and OpenSeesPy for structural analysis. These give you maximum flexibility (and lower cost) if Abaqus/ANSYS licenses are an issue.
- External Integrations: Beyond FEA, Python scripts can connect with CAD (via APIs), optimization engines, or databases. For example, automate exporting geometry to CFD or optimization packages after each design iteration.
These advanced methods keep you at the cutting edge. Integrating AI and multiscale models can greatly accelerate R&D, and using open-source tools can cut costs while giving full control.
Debugging and Validating Your Scripts
Automation is powerful, but be sure to verify your scripts carefully:
- Test on Simple Models: Before a full run, try your script on a small, known problem. Compare its output to a manually verified case. This ensures your commands do what you expect.
- Use Abaqus PDE: Abaqus includes a Python Development Environment (PDE). Step through your script line-by-line, check variable values, and watch for errors. This is invaluable for troubleshooting complicated scripts.
- Error Handling: Wrap risky operations in try/except blocks and add logging. For example, if opening an .odb file might fail, catch that exception and print an informative message. Always check that file paths and names are correct (typos in a filename or missing directory often cause silent failures).
- Check Units and Naming: A common bug is mixing units or misnaming objects. Confirm that node/element labels and part names in your script match those in the model.
- Version Control: Use Git to keep track of your scripts. This way you can revert to a working version if a new change breaks something. It also helps when collaborating – team members can review each other’s scripts and spot errors before deployment.
By building your scripts incrementally and testing often, you’ll catch mistakes early. Remember: an automated workflow should be validated like any other analysis. Once a script has been thoroughly tested, however, you gain a huge confidence boost – future runs will be consistent and accurate, without the hidden errors manual methods might introduce.
Monetizing Your CAE and Python Skills
Learning Python scripting in Abaqus isn’t just about saving time – it can also open income opportunities. Many engineers package their scripts, models, and tutorials as digital products. For example, sites like EngineeringDownloads let you sell FEA model files, Python automation scripts, or even full tutorial courses. You could create a parametric component library or a set of Abaqus macros and make it available online. Video content is another avenue: tutorials on Python-CAE can attract followers or students. In short, by mastering automation you’re building expertise that others will pay for – either by buying your tools or hiring you as a consultant.
Learning Resources and Next Steps
Ready to dive in? Start with the basics and build up:
- Official Documentation: The ABAQUS Scripting User Guide (online with your Abaqus install) covers the Python objects and methods available. It’s a must-read reference.
- Books and Courses: Consider “Python Scripts for Abaqus: Learn by Example” by Gautam Puri (a practical tutorial book). Online courses like Introduction to Abaqus Scripting (offered by training companies) can give structured learning. For example, VIAS3D and TecnoDigital School have training on Abaqus Python.
- Community Tutorials: There are many free tutorials and examples. The CAE Assistant blog and CADFEM forums often post Python snippets for common tasks. Sites like Simulia’s community, GrabCAD, and YouTube have videos walking through sample scripts. For inspiration, check the awesome-CAE GitHub repo – it’s a crowd-sourced list of CAE libraries and examples.
- Practice: The best learning is by doing. Pick a simple project (e.g. automate a beam model or a steady-state heat transfer). Write the script, debug it, and see how much faster it is than manual steps. Gradually tackle more complex tasks: assemblies, composite simulations, or coupling subroutines with Python.
- Forums and Help: Don’t hesitate to ask questions on engineering forums or StackOverflow. The community is large and many have been in your shoes.
Conclusion
Python scripting elevates CAE from rote work to streamlined engineering. As one review notes, automation brings “scalability, reproducibility, and innovation” to simulation workflows. By scripting your Abaqus analyses, you’ll drastically reduce repetitive effort and minimize errors. You’ll be able to run broad parametric studies overnight, automatically generate reports, and even apply AI techniques – things that would be impractical by hand.
Start small (even automating a simple material definition script is a win) and gradually expand. As you grow your skills, you’ll find yourself focusing more on design insight and less on menu-clicking. In today’s fast-paced industries (EVs, aerospace composites, digital twin projects), Python-driven CAE is not just a nice-to-have – it’s what keeps you ahead.
Our team at EngineeringDownloads uses exactly these techniques to serve clients faster and more accurately. If you’d like help developing custom Python scripts or training your team, feel free to reach out. Embrace the power of Python in your CAE workflow and watch your productivity soar!